Stable Diffusion Settings on iPhone: How to Trade Speed for Quality
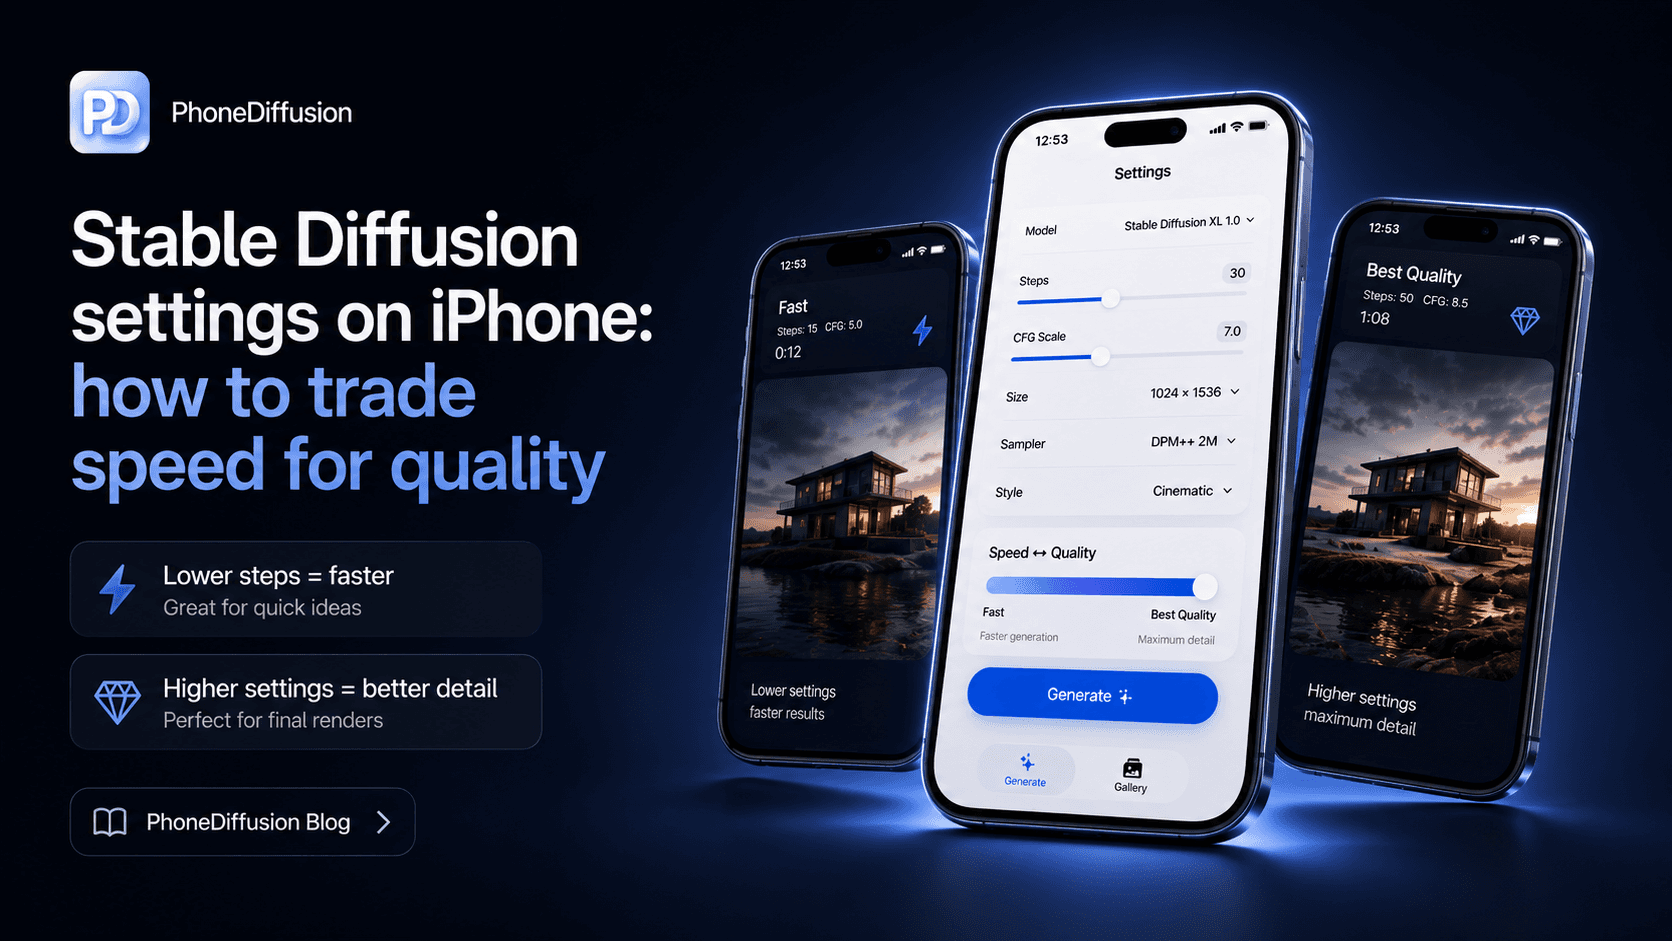
If you want better results from Stable Diffusion on iPhone, the goal is not to max every setting. On phone, the best workflow is usually a trade: enough quality to get a useful image, but not so much weight that every generation becomes slow, hot, or frustrating.
That is why mobile settings need a different mindset than desktop settings.
On iPhone, the biggest question is not "what is the perfect number?" It is "which settings give me a fast enough loop to keep creating?"
If you want to run Stable Diffusion directly on your iPhone and generate AI images offline, check out PhoneDiffusion.
The short answer
If you want a simple starting point for Stable Diffusion on iPhone:
start with a lighter model family before you start tuning smaller settings
keep resolution modest while exploring
treat steps as a speed budget
use moderate text guidance / CFG instead of maxing prompt adherence
save or reuse known-good configurations once you find a workflow that fits your phone
That is the basic mobile pattern: lighter first, then more deliberate only when the image is worth the wait.
The four settings that matter most on iPhone
Many Stable Diffusion apps expose a long list of controls. On iPhone, only a few tend to decide whether the workflow feels good or terrible.
1. Model family
This is the first and biggest decision.
A lighter SD 1.5-style workflow and a heavier SDXL-style workflow do not live in the same performance universe on phone. Apple’s public Core ML benchmark tables make that clear, and the difference is large enough that you should think about model choice before you think about fine tuning.
If the workflow already feels heavy, changing the model family usually matters more than chasing tiny parameter tweaks.
2. Resolution
Resolution is one of the clearest speed-versus-quality trades on iPhone.
The Draw Things wiki puts it simply: smaller image sizes are faster, and their beginner guidance repeatedly uses 512x512 as a safe default starting point. Apple’s public mobile benchmark tables also reflect a similar split between lighter 512-class workflows and heavier 768-class ones.
If you are still exploring prompts, styles, or composition, lower resolution is often the smartest place to stay.
3. Steps
Steps are a refinement budget.
Draw Things’ public basic settings guide says 20 to 30 steps is a standard range, with fewer steps trading away some quality for speed. That lines up well with Apple’s public benchmark setup, which uses 20 inference steps as a reference point.
For iPhone users, that usually leads to a practical rule:
use fewer steps when exploring
use more steps only when you already like the composition enough to spend extra time on it
The mistake is treating every image like a final render.
4. Text guidance / CFG
CFG, or text guidance, is easy to overuse.
The Draw Things wiki describes it as the setting that controls how closely the image follows the prompt, with 4.0 to 7.0 as a typical range and lower values allowing more creative freedom. On phone, that matters because users often push guidance up when the real problem is somewhere else: the wrong model, too much resolution, or too many steps.
Higher guidance is not a universal quality upgrade. It is usually better to treat it as a control for prompt adherence, not a magic realism slider.
A simple iPhone tuning workflow that actually works
If you are not sure where to start, this order usually makes the most sense:
Start with model fit
Pick a model family that matches your phone and your patience level.
If you are using a heavy model and the app already feels slow or unstable, the answer is probably not buried in an advanced menu. Start lighter.
Then set a draft resolution
Keep the image small enough to iterate quickly.
If you are still composing, testing prompts, or trying styles, a lower-resolution draft is usually smarter than forcing higher detail too early.
Then choose a step budget
Use enough steps to get a meaningful result, not enough to turn every draft into a full production pass.
A mobile workflow lives or dies on iteration speed. If the phone makes you wait too long, you stop experimenting.
Then adjust guidance
If the image is drifting too far from the prompt, raise guidance carefully. If it feels too rigid or lifeless, lower it.
That way you are tuning for direction, not blindly stacking compute cost.
When to stop tuning and just change the workflow
This is where many users waste time.
If the app is struggling, there are cases where deeper tuning is the wrong move:
if the phone is hot, give it time to cool
if the workflow is crashing at higher sizes, reduce the canvas first
if you keep raising steps to rescue weak drafts, reconsider the model or prompt instead
if a model only feels usable at extremely compromised settings, it may simply be the wrong model for that device
That is not failure. It is normal local-generation discipline.
Saved configurations are underrated on iPhone
One of the better public lessons from the Draw Things ecosystem is that reusable configurations matter.
The Draw Things configuration docs explain why: once you find a setup that works for a particular model or task, save it. Reusing known-good configurations is one of the easiest ways to stay productive and avoid re-learning the same settings every session.
That is especially useful on iPhone, where the margin between "fast enough" and "too annoying" is smaller than it is on desktop.
A practical setup might include:
one fast draft configuration
one balanced still-image configuration
one slower high-quality configuration for final passes
That structure is often more useful than chasing one mythical perfect preset.
What settings advice gets wrong on iPhone
A lot of general Stable Diffusion advice was written for desktop workflows. That creates three common problems on iPhone:
desktop-first step counts that assume much more compute headroom
aggressive resolution advice that feels normal on a GPU but punishing on a phone
too much focus on niche settings before getting model family and image size right
Phone users usually need a simpler hierarchy:
model family
resolution
steps
guidance
everything else
That order is not glamorous, but it is useful.
How PhoneDiffusion fits this topic
PhoneDiffusion does not need to win by exposing a giant advanced-settings surface or explaining backend details.
The more credible lane is to help users understand the tradeoffs that matter most on iPhone:
lighter versus heavier model families
fast drafting versus slower final output
device fit instead of one-size-fits-all promises
local generation that behaves like a real mobile workflow
That is the kind of guidance technical users and prosumers actually need.
If you want to run Stable Diffusion directly on your iPhone and generate AI images offline, check out PhoneDiffusion.
FAQ
What is the best Stable Diffusion setting on iPhone?
There is no single best setting. The best setup depends on your phone, the model family, and whether you are drafting quickly or trying to produce a more finished image.
How many steps should I use on iPhone?
A practical starting point is usually around the standard ranges public mobile guides use, then adjusting downward for faster drafts or upward for more deliberate final passes. On phone, fewer steps are often the better creative workflow during exploration.
Should I use higher resolution on iPhone?
Only when the image is already worth it. Higher resolution is one of the clearest ways to slow local generation down and trigger thermal or stability issues sooner.
What CFG or text guidance should I use?
Treat guidance as prompt-following control, not a universal quality dial. Public mobile-oriented guides often use moderate ranges rather than extreme ones, and that is usually the safer starting point.
Why does the same model feel fine one day and frustrating the next?
Thermals, background load, repeated generations, and different resolutions can change the feel of the same setup on the same phone.
Final takeaway
The best Stable Diffusion settings on iPhone are not the most extreme ones.
They are the settings that give you a usable creative loop: light enough to iterate, strong enough to get a meaningful image, and honest about the limits of the phone in your hand.
That is the right lane for PhoneDiffusion too. A serious iPhone image-generation product should make those speed-versus-quality tradeoffs legible instead of hiding them behind vague AI-art marketing.